>>
30-MINUTE MEALS! Get the email series now →


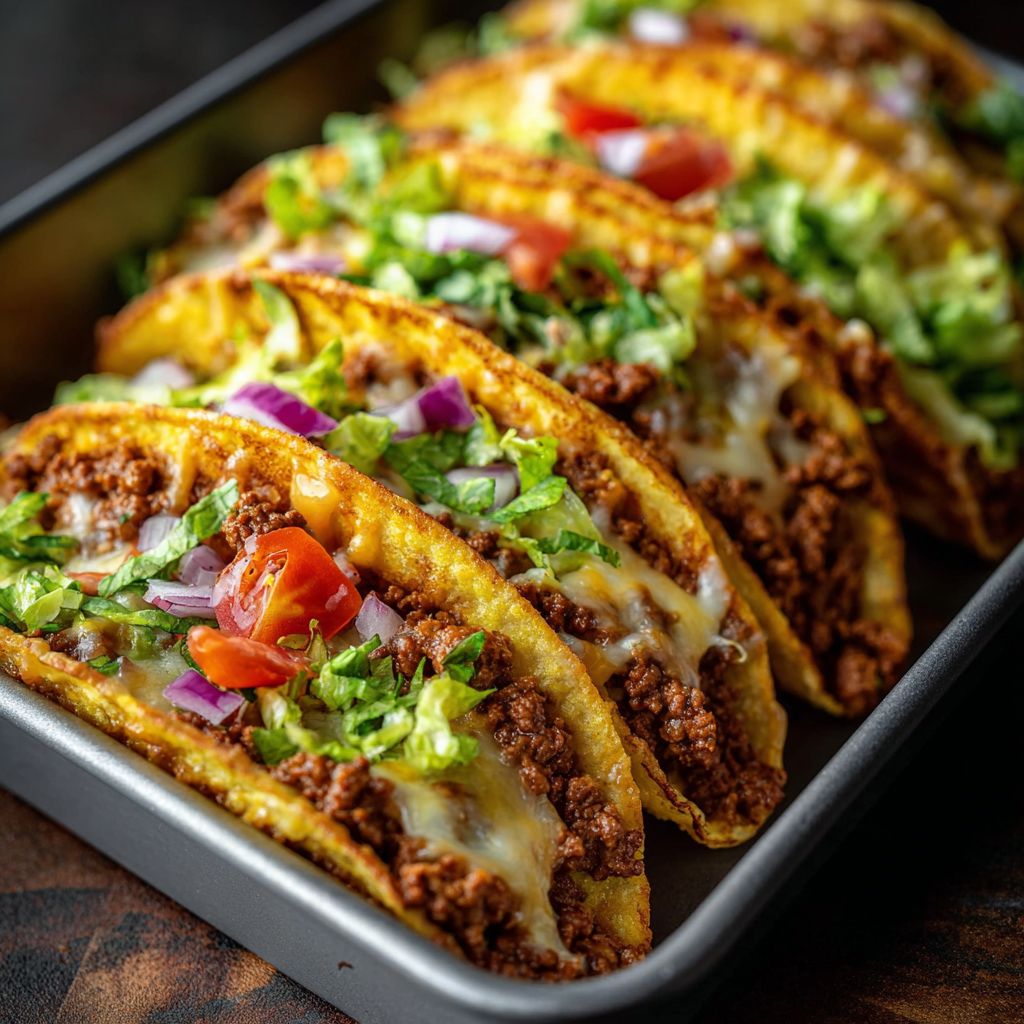
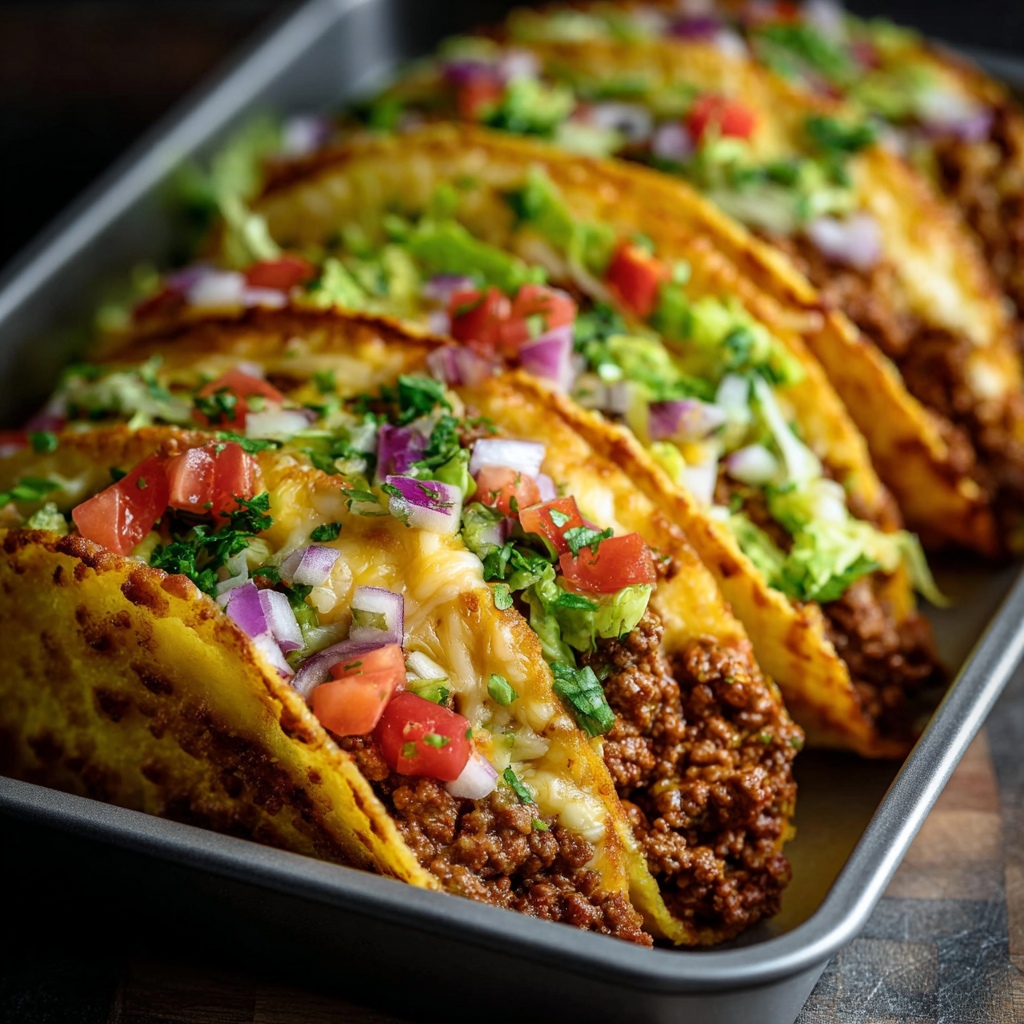
Crispy, cheesy oven-baked tacos filled with seasoned beef and topped with fresh, vibrant garnishes—an effortless weeknight favorite the whole family will love.

This oven-baked version of stuffed tacos became a lifesaver on busy weeknights when I wanted the crunch of a perfectly crisp shell and the gooey pull of melted cheese without standing over a skillet for long. I first developed this approach when guests arrived unexpectedly and I had eight hard shells, a pound of ground beef, and handfuls of toppings in the fridge. The quick bake transforms everyday ingredients into something celebratory: the shells crisp up, the filling stays juicy, and the cheese creates a golden, bubbling blanket that helps the toppings stick.
I keep coming back to this method because it is forgiving and adaptable. The meat filling is seasoned simply with a packet of taco seasoning and tomato sauce so it has balance between savory and tangy notes. The final texture is a contrast of crisp shell, tender spiced meat, and creamy cheese, finished with cool, fresh lettuce and bright tomatoes. Every time I bring these to the table, family members race to claim the best toppings and the bowls come back nearly empty.
In my experience, the first time I served these I tucked them into a shallow baking dish to keep them upright and discovered the cheese drips slightly onto the dish and crisps into little savory shards. That became a family favorite detail; my kids reach for those crunchy bits first. Over the years I have tweaked timing and topping ratios, and the result is reliably delicious every time.
My favorite part is the crunchy cheese edges that form where the cheese meets the baking dish and shell—those shards are irresistible. Family members always debate who gets the first one. I also love how this method keeps the filling moist; baking both melts the cheese and crisps the shell without drying the meat, which can happen when shells are fried ahead of time and left to sit with wet filling.
Store leftovers in an airtight container in the refrigerator for up to 3 days. To retain the best texture, keep fresh toppings separate and only add them when serving. Reheat in a 350°F oven for 8 to 10 minutes or until warmed through; a toaster oven works well for single servings. For freezing, cool completely, flash-freeze assembled tacos on a tray, then transfer to a heavy-duty bag. Reheat from frozen at 375°F for 12 to 18 minutes, covering loosely with foil for the first 10 minutes to prevent over-browning on the cheese.
For a lighter version, swap the ground beef for ground turkey or chicken and use reduced-fat cheese. To make the filling vegetarian, replace the meat with a mixture of cooked lentils and finely chopped mushrooms, or use seasoned crumbled tempeh. If you prefer softer shells, warm flour tortillas briefly and fill with the beef mixture, then melt cheese under the broiler. For dairy-free eaters, use a plant-based shredded cheese alternative and plain dairy-free yogurt instead of sour cream.
Serve these with a simple Mexican-style rice and refried or black beans for a complete meal. For a lighter plate, offer a crisp cabbage slaw dressed with lime and cilantro. Garnishes like pickled red onions, sliced radishes, and a squeeze of fresh lime brighten the rich, cheesy filling and add texture contrast. For game-day or party service, present toppings in small bowls so guests can build their own.
Hard-shell tacos are a Tex-Mex innovation rather than an authentic Mexican staple. This baked version draws on home-cooking techniques that adapt street-style tacos into convenient tray service. The combination of seasoned meat, melted cheese, and fresh garnishes reflects the cross-cultural blending of flavors we now associate with many North American taco traditions.
In summer, swap the tomato topping for roasted corn and diced avocado, and use fresh salsa for a brighter flavor. In cooler months, add a pinch of smoked paprika to the filling and serve with warm chipotle crema. For holiday gatherings, double the batch and offer an array of toppings like pickled jalapeños, roasted poblano strips, and a cranberry salsa for a festive twist.
Prepare the beef mixture up to 3 days ahead and refrigerate in a sealed container. When ready to serve, spoon into shells and bake as directed for a quick assembly. Portion the cooked filling into individual containers for grab-and-go lunches that can be warmed and served with a side salad. Use resealable containers with dividers for toppings to keep everything fresh.
These oven-baked cheesy tacos are dependable, fast, and perfect for busy households. They are an easy way to bring the family together over a casual, customizable meal that feels both comforting and special. Try making a double batch next time for simple leftovers that reheat beautifully.
To keep shells upright in the baking dish, wedge crumpled foil underneath each shell to stabilize them before adding filling.
If your filling seems dry after simmering, add 1 to 2 tablespoons of water or broth and warm through to loosen without making it runny.
Shred cheese at home for better melt; pre-shredded cheese often contains anti-caking agents that can affect melting.
Broil for 20 to 40 seconds at the end only if you want extra browning on the cheese; stay close to avoid burning the shells.
This nourishing oven-baked cheesy tacos recipe is sure to be a staple in your kitchen. Enjoy every moist, high protein slice — it is perfect for breakfast or as a wholesome snack any time.
This Oven-Baked Cheesy Tacos recipe makes perfectly juicy, tender, and flavorful steak every time! Serve with potatoes and a side salad for an unforgettable dinner in under 30 minutes.
Preheat oven to 400°F (200°C). Arrange 8 hard taco shells upright in a shallow baking dish so they support themselves and will crisp evenly during baking.
In a medium skillet over medium heat, cook 1 lb ground beef with the diced onion until the meat is browned and onion is softened, about 6 to 8 minutes. Drain excess fat, return to pan, add minced garlic and taco seasoning, stir for 30 to 60 seconds, then pour in 2/3 cup tomato sauce or salsa and simmer for 4 to 5 minutes to reduce.
Spoon the seasoned beef evenly into the 8 shells, packing a little so filling stays in place. Top each with approximately 1/4 cup shredded cheese so the cheese covers the meat and will melt into a golden layer.
Place the baking dish in the oven and bake for 10 to 15 minutes, watching for cheese to melt and shells to become crisp and golden. For extra browning, broil 20 to 40 seconds at the end, watching closely to avoid burning.
Remove tacos from oven and let rest 1 to 2 minutes. Top with shredded lettuce, diced tomatoes, red onion, and cilantro. Serve warm with sour cream, guacamole, jalapeño slices, and hot sauce on the side for customization.
Last Step: Please leave a rating and comment letting us know how you liked this recipe! This helps our business to thrive and continue providing free, high-quality recipes for you.
Leave a comment & rating below or tag
@mrsrecipe on social media!

Tiny crostini topped with creamy cheese, bright cranberry, crunchy pecans and rosemary — an effortless 5-minute starter that looks festive and tastes like the holidays.

Light, slightly spiced pancakes inspired by African home kitchens—fluffy, buttery, and perfect for breakfast or brunch with syrup, cinnamon sugar, or a savory filling.
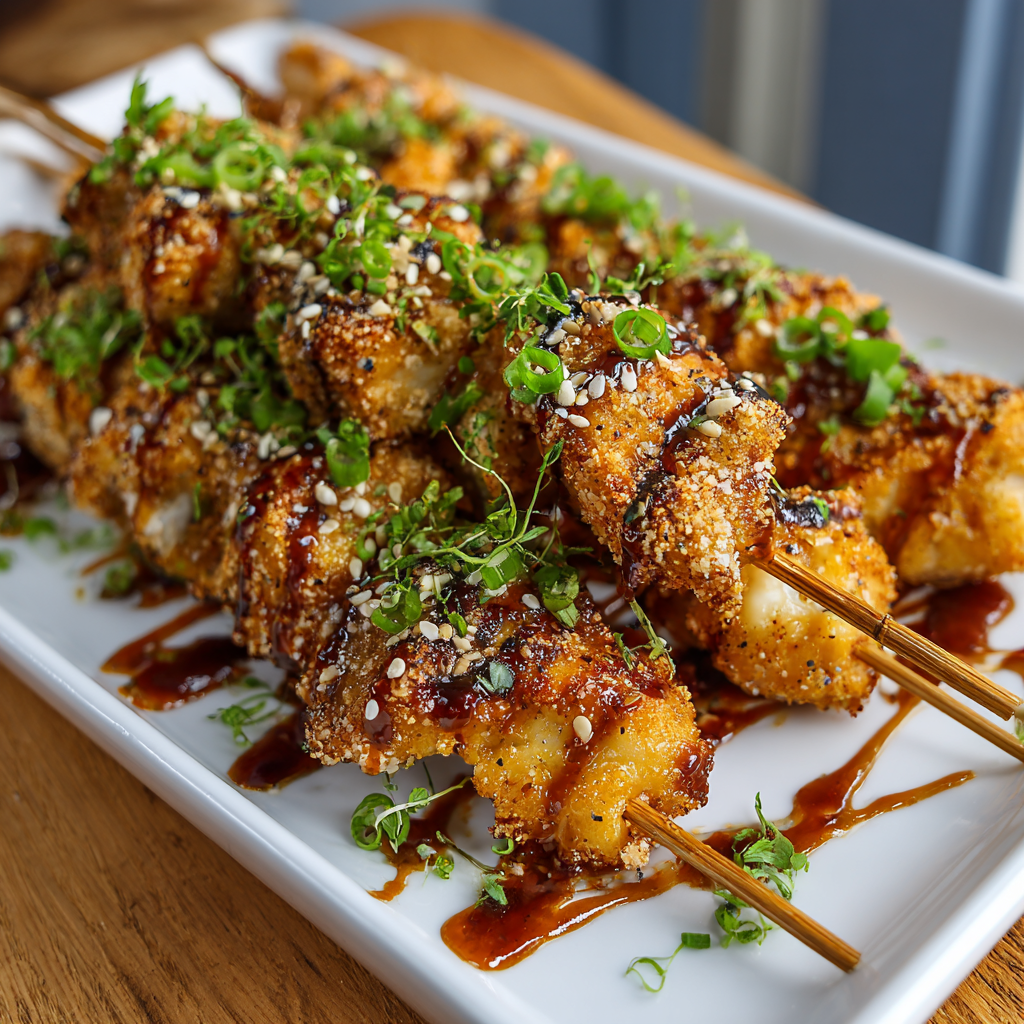
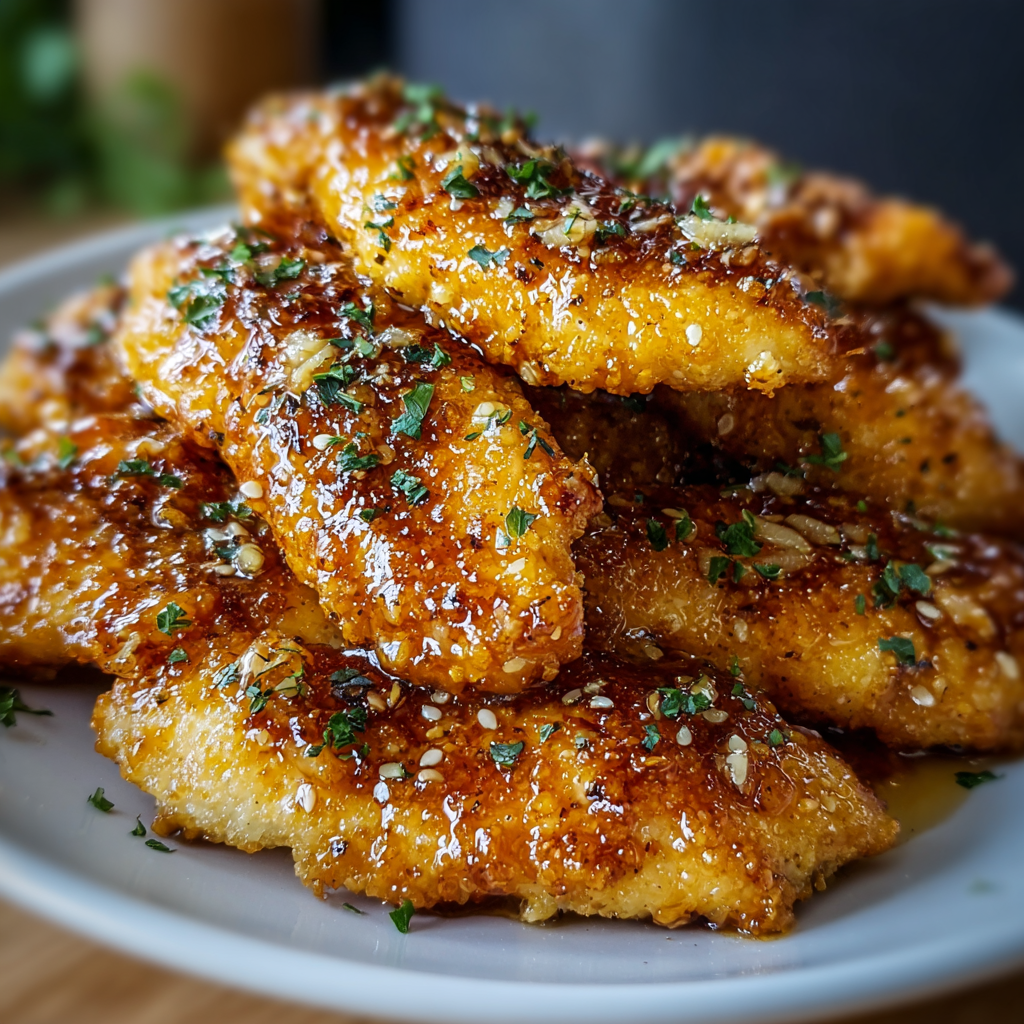
Crispy, saucy chicken skewers made in the air fryer with a sweet-spicy bang bang sauce—perfect for weeknight dinners, parties, or meal prep.
Leave a comment & rating below or tag @mrsrecipe on social media!
Enjoyed this recipe? Share it with friends and family, and don't forget to leave a review!
This recipe looks amazing! Can't wait to try it.
Comments are stored locally in your browser. Server comments are displayed alongside your local comments.
Quick and easy dinner ideas delivered to your inbox.