
Old-Fashioned Butter Mints

Creamy, melt-in-your-mouth butter mints made with simple pantry ingredients — perfect for gifting, after-dinner sweets, and nostalgic holiday treats.
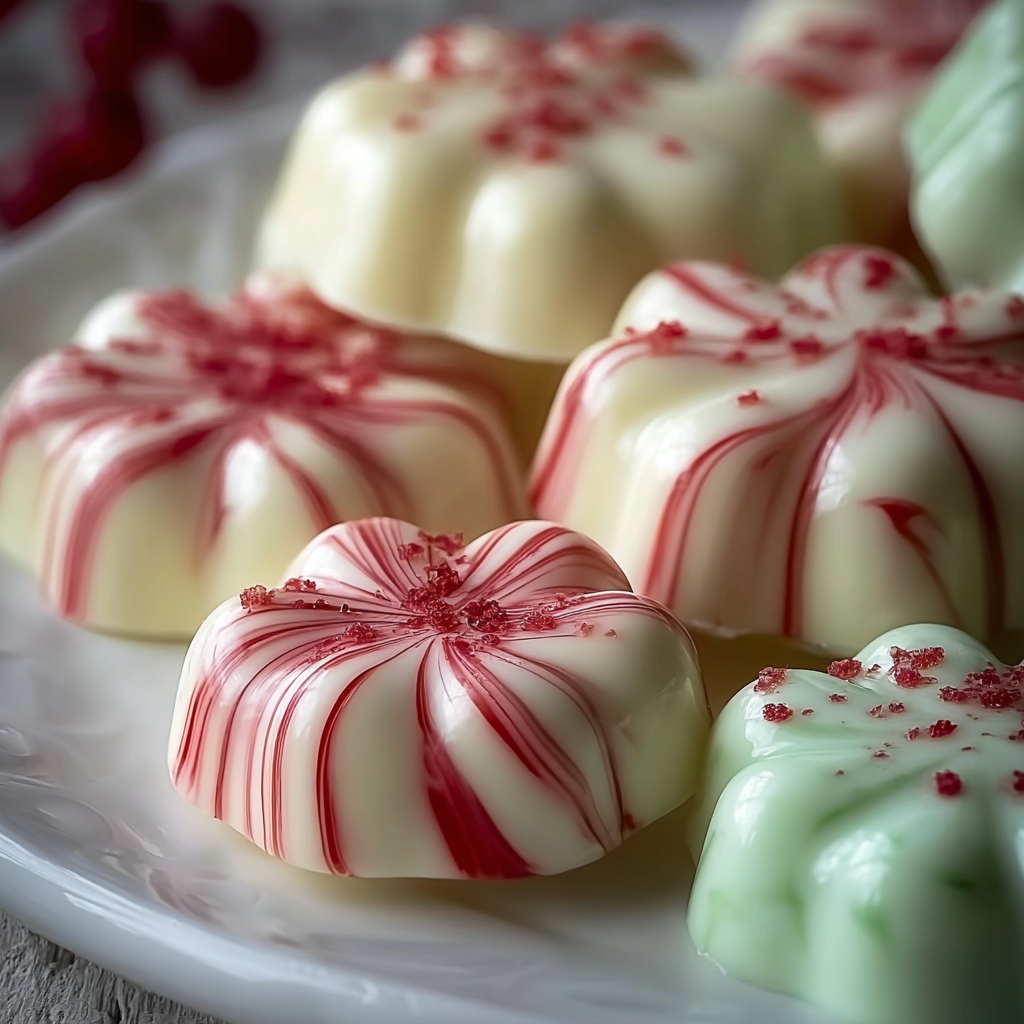
This old-fashioned butter mint has been a little kitchen miracle at my house for years — the kind of confection that sparks childhood memories the moment the buttery, peppermint-sweet scent hits the air. I discovered this version after finding an antique recipe card tucked inside a cookbook my grandmother used; I adapted the proportions to make a firm but tender sweet that still melts quietly on the tongue. It’s the small things I love: the soft, satin texture from creamed butter, the cool pop of peppermint, and the tiny, bright specks of gel coloring that make each bite feel festive.
I make these whenever we need a simple homemade gift or an elegant finish to a cozy dinner. They require almost no heat, only basic tools, and a little patience while they rest. What makes them special is the contrast of smooth butter and finely powdered sugar that forms a delicate, firm bite that dissolves with a peppermint finish. My partner always brings them to holiday gatherings; friends ask for a tin after dinner, and the recipe has become part of our family rituals for bringing a little old-fashioned charm back to the table.
Why You'll Love This Recipe
- Ready with minimal active time: about 15 minutes of hands-on work, then undisturbed drying for 8 hours or overnight — perfect for prepping ahead.
- Uses pantry staples: unsalted butter, powdered sugar, a splash of cream, and peppermint extract — no specialty equipment required.
- Customizable color and flavor: divide and tint with gel coloring or try different extracts for subtle variations.
- Excellent for gifting: they store well in tins and hold shape, making them ideal for holidays and special occasions.
- Dainty, melt-away texture: they’re rich but light in mouthfeel because the powdered sugar creates a fine satin finish.
- Beginner-friendly technique: creaming and shaping are straightforward; troubleshooting tips included for stickiness or dryness.
When I first made these, my teenager declared them ‘‘retro and perfect,’’ and a neighbor who prefers dark chocolate loves the mint contrast so much she asked for the recipe. Over the years I refined the cream addition and resting time so the texture is consistently smooth rather than grainy — those small adjustments make all the difference.
Ingredients
- Unsalted butter (1/2 cup): Use high-quality butter like Land O'Lakes or Plugrá for a clean, creamy base. The butter must be fully softened but not melted; this gives structure and silkiness.
- Powdered sugar (4 cups): Brands such as Domino or C&H give consistent fineness. Sift if your sugar is compacted—ultra-fine icing sugar produces the smoothest texture.
- Heavy cream or whole milk (1 tablespoon): Heavy cream adds richer mouthfeel; milk works in a pinch. Add sparingly — too much liquid makes the dough sticky.
- Peppermint extract (1/2 teaspoon): Choose a pure extract like Watkins or McCormick for a bright, authentic mint note. Adjust slightly if you prefer a stronger taste.
- Salt (1 pinch): A tiny bit balances sweetness and brightens the peppermint.
- Gel food coloring (optional): Brands like AmeriColor or Wilton gel coloring are concentrated and won’t alter the texture — use a tiny amount to tint small batches.
Instructions
Cream the butter: Place the softened butter in a large mixing bowl and beat with a hand mixer or stand mixer on medium speed until smooth and creamy, about 1–2 minutes. You want a spreadable, silky texture — too long will warm the butter. If the butter feels greasy, stop and chill for a few minutes; if it’s still cool and firm, increase the mixer speed briefly. Add flavor and liquid: Scrape down the bowl, then add the peppermint extract, the pinch of salt, and the heavy cream or milk. Mix until fully incorporated and the mixture is homogeneous. The cream helps bind powdered sugar and gives the mints a smooth finish; add no more than a tablespoon at first. Incorporate powdered sugar: With the mixer on low, gradually add the powdered sugar in two or three additions so it doesn’t cloud your kitchen. Mix until a soft dough forms that pulls away from the bowl. If the dough is too sticky to handle, fold in up to 1/4 cup extra powdered sugar; if it’s crumbly, add a scant 1/2 teaspoon more cream. Divide and color (optional): Transfer the dough to a surface lightly dusted with powdered sugar. If you want colored mints, divide the dough into portions and knead a tiny drop of gel food coloring into each until evenly tinted. Wear disposable gloves to avoid staining your hands and knead quickly to prevent warming the butter. Shape into ropes and cut: Roll each portion into a thin rope about 1/4 to 1/2 inch in diameter on a powdered sugar-dusted surface. Use a bench scraper or a sharp knife to cut ropes into bite-sized pieces, about 1/2 inch long. For uniform pieces, chill ropes for 10–15 minutes before cutting. Dry at room temperature: Place the cut mints on parchment-lined baking sheets in a single layer and allow them to dry at room temperature for 8 hours or overnight. They should develop a tender but firm exterior; avoid refrigeration during drying as humidity can prevent proper setting.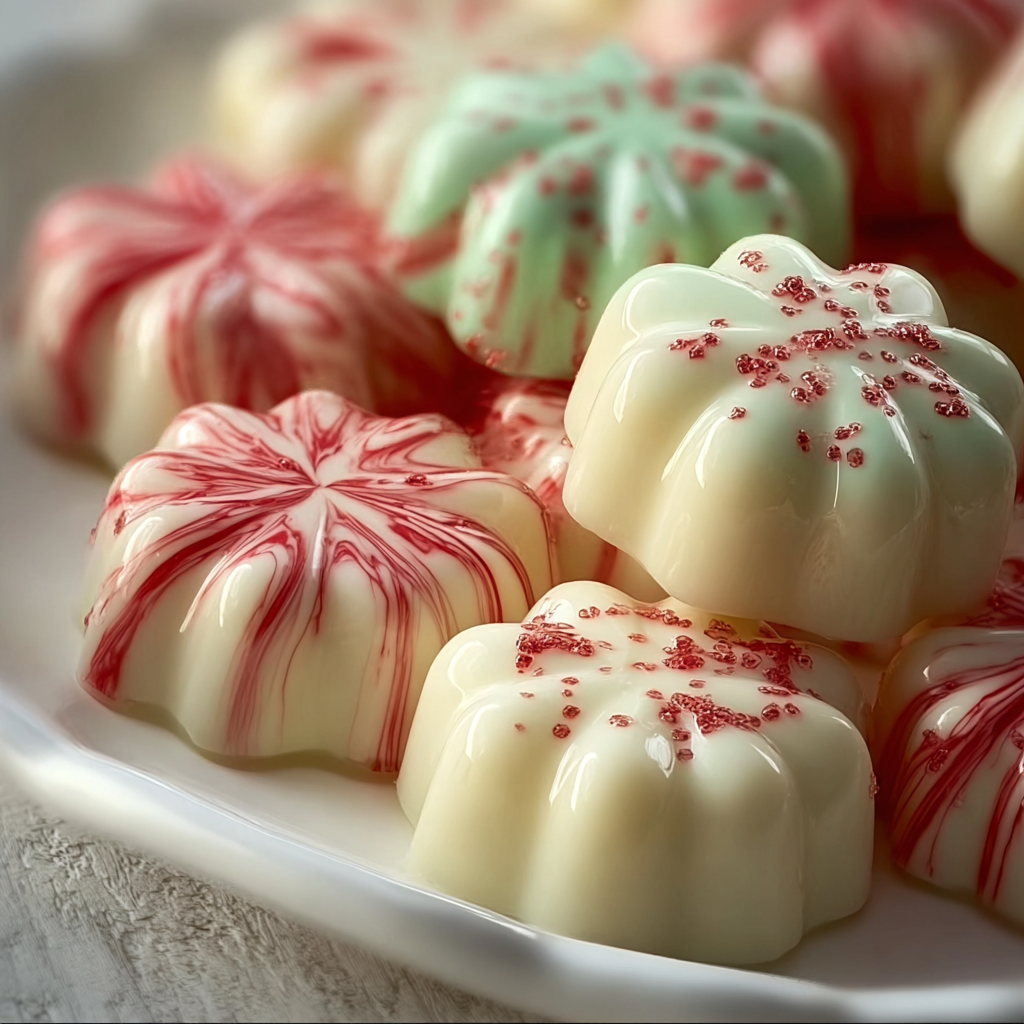
You Must Know
- These mints are high in sugar and should be stored at cool room temperature or refrigerated for longer keeping; they freeze well for up to 3 months in airtight containers.
- Allow full drying time: 8 hours yields the best texture; less time risks tacky surfaces that stick together in storage.
- Because they contain butter, they are not dairy-free or vegan; however, they are naturally gluten-free when made with pure powdered sugar and no added wheat-based decorations.
- Work on a cool surface and handle minimally to prevent the butter from softening and the dough turning greasy.
My favorite thing about these is how quickly they bring back memories: a small tin on the mantel at holiday gatherings, or a scattering of pastel mints at tea. One year I made tiny mint bouquets for a neighbor’s birthday, and she said the first bite reminded her of candy her mother used to make — that kind of reaction makes the small effort of shaping and drying totally worth it.

Storage Tips
Store finished pieces in a single layer or in layers separated by parchment in an airtight tin or container at cool room temperature, away from direct sunlight. They keep for up to two weeks at room temperature; for longer storage, freeze in sealed freezer-safe containers for up to three months. To thaw, move the container to the refrigerator for a few hours and then bring to room temperature before opening to avoid condensation on the surface. Avoid airtight storage while the mints are still tacky — allow them to dry completely before sealing to prevent sticking.
Ingredient Substitutions
If you don’t have heavy cream, use whole milk but reduce the amount by about one-quarter to prevent a sticky dough. For a vegan alternative, try a firm vegetable-based butter substitute and a non-dairy milk — results will be slightly different in flavor and mouthfeel. To vary the mint flavor, substitute 1/2 teaspoon of peppermint extract with 1/2 teaspoon of spearmint or 1/4 teaspoon almond extract for a marzipan-like accent. If powdered sugar is unavailable, blitz granulated sugar to a fine powder in a powerful blender before measuring; use caution and sift for best texture.
Serving Suggestions
Serve these as petite mints after dinner on a small porcelain dish, tucked into party favor sachets, or arrayed around a coffee cake platter. For a prettier presentation, roll some pieces lightly in finely grated chocolate or use a tiny dot of melted dark chocolate to sandwich two mints together. They pair beautifully with strong coffee or a light dessert wine and make a lovely palate cleanser between courses at a dinner party.
Cultural Background
Butter mints are a classic confection in American home baking with roots in turn-of-the-century candy making, where sugar and butter were combined to produce simple, shelf-stable sweets. They often appear in holiday baking boxes and church bazaars, and have enjoyed revivals as nostalgic homemade gifts. Regional variations include the addition of nutmeg or vanilla in the southern United States and the use of almond extract in some midwestern family recipes.
Seasonal Adaptations
In winter, tint small batches in soft reds and greens and use peppermint extract for a holiday profile. For spring, use pastel gel colors and try a hint of lemon extract mixed with a touch of vanilla for a lighter profile. For summer gatherings, swap in spearmint and make very thin ropes to create airy, nearly translucent mints. For birthdays, add a drop of natural food coloring to match party themes or lightly dust with pearlized edible glitter for a celebratory look.
Meal Prep Tips
Prepare a double batch and portion into small containers to give as gifts or to store for quick treats. Shape ropes and freeze them on a tray until firm; then place the cut pieces into an airtight container in the freezer — this speeds up setting and makes it easy to slice evenly. To re-soften slightly before serving, let frozen mints rest at room temperature for 20–30 minutes. Keep a small jar of powdered sugar at your rolling station to quickly fix sticky spots while shaping.
These mints are an invitation to slow, simple candy-making that rewards patience with a delicate finish and timeless flavor. Try them once and you’ll find little reasons to make them again and again — for friends, for celebrations, or for those quiet afternoons when a small sweet seems just right.
Pro Tips
Keep the butter just softened — over-softened or melted butter will make the dough greasy.
Work on a cool surface and use powdered sugar to dust the work area to prevent sticking.
Chill rolled ropes for 10–15 minutes before cutting to get cleaner, uniform pieces.
Use gel coloring; a tiny amount provides strong color without adding liquid that would change texture.
This nourishing old-fashioned butter mints recipe is sure to be a staple in your kitchen. Enjoy every moist, high protein slice — it is perfect for breakfast or as a wholesome snack any time.
FAQs about Recipes
How long should butter mints dry?
Drying at room temperature for 8 hours or overnight gives the best texture. If humid, extend drying time or dry in an air-conditioned room.
What if my dough is too sticky or too dry?
If the dough is too sticky after adding sugar, fold in extra powdered sugar 1 to 2 tablespoons at a time until manageable. If too dry, add a scant 1/4 teaspoon cream.
Tags
Old-Fashioned Butter Mints
This Old-Fashioned Butter Mints recipe makes perfectly juicy, tender, and flavorful steak every time! Serve with potatoes and a side salad for an unforgettable dinner in under 30 minutes.
Ingredients
Main
Instructions
Cream the butter
Beat 1/2 cup softened unsalted butter in a large bowl with a hand mixer or stand mixer until smooth and creamy, about 1–2 minutes. Stop before the butter becomes glossy and greasy from overbeating.
Add flavor and liquid
Add 1/2 teaspoon peppermint extract, 1 pinch salt, and 1 tablespoon heavy cream or milk. Mix until combined and the mixture is homogeneous.
Incorporate powdered sugar
Gradually mix in 4 cups powdered sugar, adding in two or three additions on low speed. Mix until a soft dough forms that pulls away from the bowl; adjust with small amounts of extra sugar or cream if needed.
Divide and color
Divide dough if using colors. Knead a small drop of gel food coloring into each portion using lightly powdered sugar to avoid stickiness. Work quickly to avoid warming the dough.
Shape and cut
Roll each portion into thin ropes about 1/4–1/2 inch in diameter on a powdered sugar-dusted surface. Cut into 1/2-inch pieces with a bench scraper or knife; chill ropes briefly for cleaner cuts if desired.
Dry at room temperature
Arrange pieces on parchment and allow to dry at room temperature for 8 hours or overnight until they develop a firm exterior. Store in an airtight container once fully dry.
Last Step: Please leave a rating and comment letting us know how you liked this recipe! This helps our business to thrive and continue providing free, high-quality recipes for you.
Nutrition
Did You Make This?
Leave a comment & rating below or tag
@mrsrecipe on social media!
Categories:
You might also like...

5-Minute Thanksgiving Appetizers That Wow Every Guest
Tiny crostini topped with creamy cheese, bright cranberry, crunchy pecans and rosemary — an effortless 5-minute starter that looks festive and tastes like the holidays.

African-Style Pancakes (Fluffy, Comforting, and Easy)
Light, slightly spiced pancakes inspired by African home kitchens—fluffy, buttery, and perfect for breakfast or brunch with syrup, cinnamon sugar, or a savory filling.

Air Fryer Bang Bang Chicken Skewers
Crispy, saucy chicken skewers made in the air fryer with a sweet-spicy bang bang sauce—perfect for weeknight dinners, parties, or meal prep.
Did You Make This?
Leave a comment & rating below or tag @mrsrecipe on social media!
Rate This Recipe
Share This Recipe
Enjoyed this recipe? Share it with friends and family, and don't forget to leave a review!
Comments (1)
This recipe looks amazing! Can't wait to try it.
Comments are stored locally in your browser. Server comments are displayed alongside your local comments.
Hi, I'm Clara!
What's Popular

Get My 30-Minute Meals email series!
Quick and easy dinner ideas delivered to your inbox.