
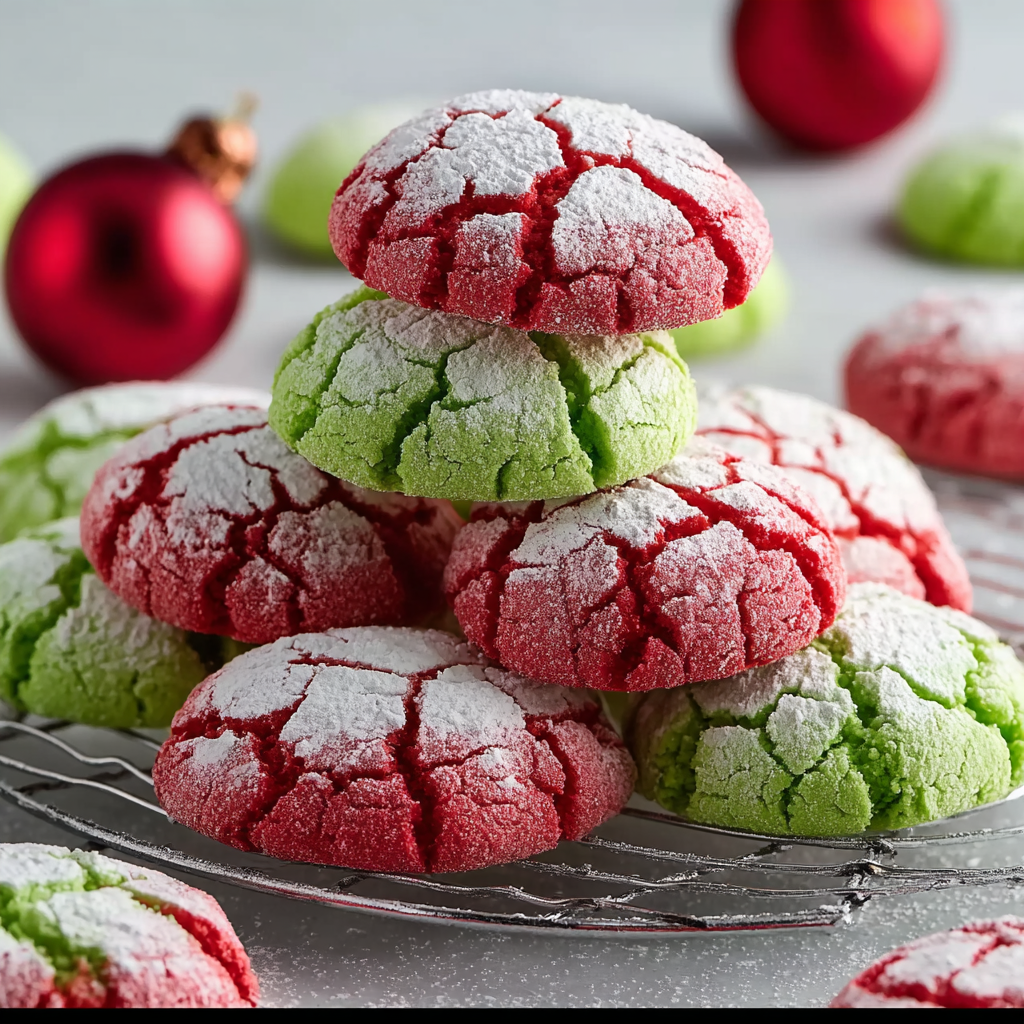
Festive Red and Green Crinkle Cookies

Soft, crinkly red and green cookies made from a white cake mix — quick to make, vibrant, and perfect for holiday gatherings.

This festive red and green crinkle cookie recipe has been my go-to shortcut for holiday baking when I want dazzling color without a lot of fuss. I first adapted this method the winter I realized I needed two dozen cookies for a last-minute potluck and only had pantry staples: a box of white cake mix, eggs, and oil. The ease of a single-bowl dough that transforms into soft, crackled cookies covered in powdered sugar felt like holiday magic. The texture is tender and slightly cakey with a soft center and crisp, crinkled edges; the sugar coating gives each bite an extra whisper of sweetness and contrast.
What makes these special is how reliably they spread into those pretty crinkles while keeping that melt-in-your-mouth softness when you bite in. Because the dough is so forgiving, they are ideal for baking with kids — the bright gel colors are vibrant with just a few drops, and rolling in powdered sugar is a low-stress, high-joy step. Over the years I’ve brought these to cookie exchanges, family dinners, and school parties; they always vanish first because they look as fun as they taste.
Why You'll Love This Recipe
- Ready in about 45 minutes from start to finish, including a short chill — perfect for when you need quick holiday cookies.
- Uses one box of white cake mix and a couple of pantry staples, so no complicated shopping list or special flours required.
- Gel food coloring gives intense, vivid red and green hues without thinning the dough like liquid food coloring can.
- Rolling in powdered sugar creates classic crinkle contrast and helps create those signature cracks during baking.
- Soft, slightly cakey centers and set edges make these easy to pack, freeze, or share at gatherings.
- Kid-friendly tasks: color the dough, scoop, and roll — everyone can help and feel proud of the bright results.
I remember the first time my niece helped color the dough bright green; she insisted on stirring until the color "yelled," and her delight when the cookies came out crinkled and sparkly is one of my favorite baking memories. Family and friends always comment on the festive colors, and these cookies have become a reliable last-minute solution when I want something pretty and homemade in a hurry.
Ingredients
- White cake mix (1 box, 13.25 oz): The base provides structure, sweetness, and a fine crumb. Choose a high-quality brand for better vanilla flavor — I like Duncan Hines or Pillsbury white cake mix for reliable results.
- Eggs (2 large): Bind the dough and add moisture. Use large eggs at room temperature for a smoother dough and more consistent color distribution.
- Vegetable oil (1/3 cup): Keeps cookies tender and delivers a soft, cakey texture. Canola or neutral vegetable oil works best to avoid imparting extra flavor.
- Powdered sugar (1/3 cup) for coating: Creates the snowy crinkle exterior and helps the surface crack attractively in the oven. Sift if it has any lumps.
- Red and green gel food coloring: Gel concentrates color without thinning the batter, giving vibrant holiday shades with only a few drops.
Instructions
Mix the dough: In a large mixing bowl, whisk together the white cake mix, 2 large eggs, and 1/3 cup vegetable oil until a smooth, thick dough forms. The dough should pull away from the sides of the bowl but remain tacky; if it feels dry, add a teaspoon of water at a time. Divide and color: Split the dough into two equal portions. Place each portion in a separate bowl and add gel food coloring — a few drops at first, then more until the color is deep and even. Knead the color into the dough with a spatula or clean hands for thorough distribution. Chill: Cover each bowl tightly with plastic wrap and refrigerate for 30 minutes. Chilling firms the dough so the cookies don’t over-spread and helps the colors set for a clean crackle pattern. Preheat and prepare pans: Preheat the oven to 375°F (190°C). Line a baking sheet with parchment paper or a silicone mat to prevent sticking and promote even browning. Portion and coat: Scoop tablespoon-sized portions of dough and roll into smooth balls. Place powdered sugar in a shallow bowl and roll each ball generously until fully coated — the powdered sugar layer is essential for the classic crinkle look. Arrange and bake: Place the coated dough balls about 2 inches apart on the prepared baking sheet. Bake for 9 to 11 minutes, until the surface is crinkled and the edges are set but the centers still look soft. Avoid overbaking; the cookies will continue to set as they cool. Cool: Allow cookies to rest on the baking sheet for 2 to 3 minutes, then transfer to a wire rack to cool completely. This helps maintain soft centers and crisp edges.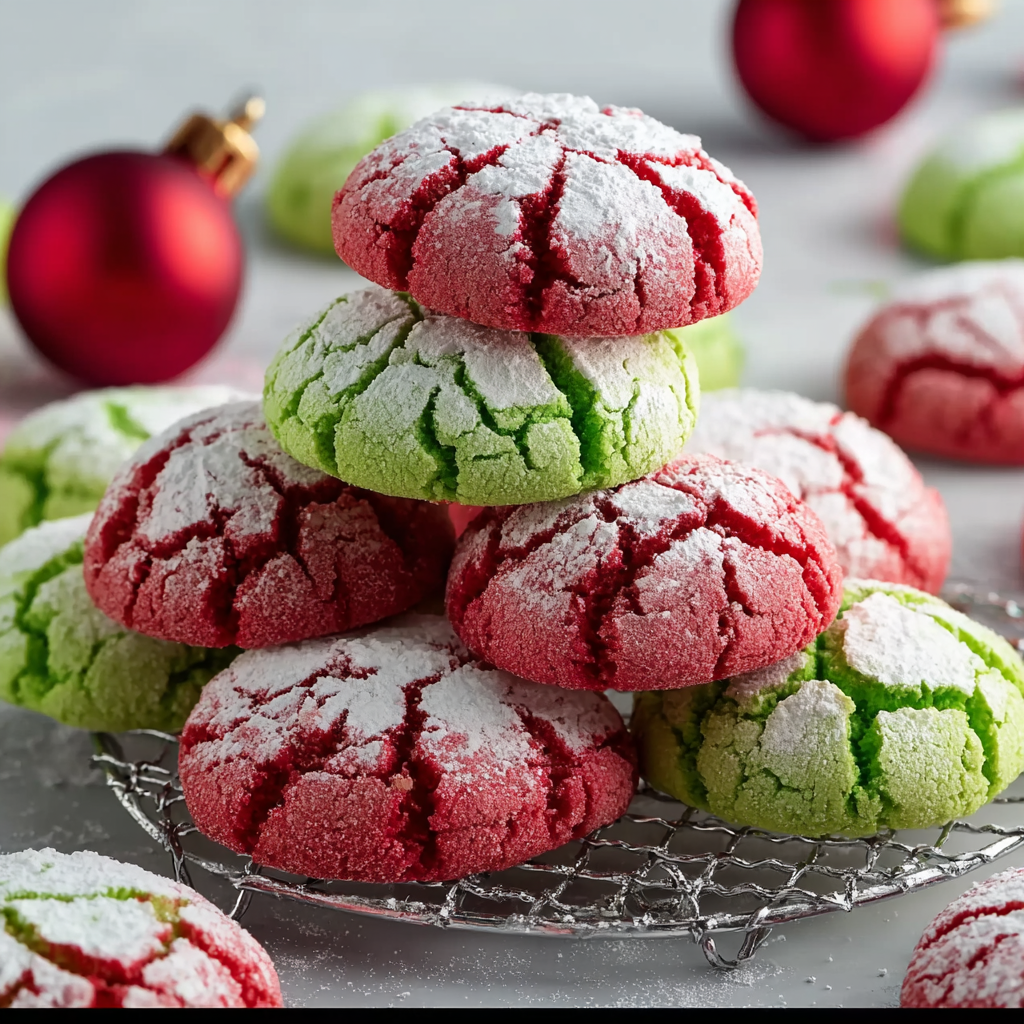
You Must Know
- These cookies freeze well for up to 3 months; flash-freeze on a tray first, then transfer to a sealed container to prevent sticking.
- Because the dough is made from cake mix, cookies are slightly cakier than traditional butter-based crinkle versions — expect tender, sponge-like centers.
- Use gel coloring for best vibrancy; liquid coloring may require more and can alter dough consistency.
- Allergens: contains eggs and wheat; check your cake mix label for milk or soy ingredients if you have allergies.
My favorite part is how small changes produce different results: a little extra chill time yields more pronounced crinkles, while a touch more oil softens the crumb. Once I switched to gel color, the red stayed bright after baking instead of browning, which made a big difference at cookie exchanges. Family members often ask for the green batch first because of the intense color and soft center — a small thing that brings a lot of joy.
Storage Tips
Store cooled cookies in an airtight container at room temperature for up to 4 days. To keep them from sticking, place parchment sheets between layers. For longer storage, freeze on a tray until firm, then move to a freezer bag or container for up to 3 months. To thaw, transfer frozen cookies to the refrigerator overnight or sit at room temperature for an hour. For a freshly baked texture, warm individual cookies in a 300°F oven for 5 minutes or microwave for 6 to 8 seconds.
Ingredient Substitutions
If you need to adapt, try these swaps: use a gluten-free white cake mix for a gluten-free version (check the brand for reliable results), or replace vegetable oil with melted coconut oil for a subtle tropical note — measure the same volume and cool slightly before adding. To make smaller cookies, use a 3/4 tablespoon scoop and reduce bake time by 1 to 2 minutes. For less sweetness, roll only half of each ball in powdered sugar or dust with a light sift instead of a full coating.
Serving Suggestions
Serve these cookies on a festive platter with sprigs of rosemary or mint for garnish to evoke holiday greenery. They pair beautifully with hot cocoa, coffee, or mulled cider. For cookie exchanges, place red and green cookies in alternating rows or stack them with parchment between layers. These also work as edible gifts — wrap a dozen in cellophane and tie with ribbon for an attractive, homemade present.
Cultural Background
Crinkle-style cookies have been popular in various forms across American holiday baking for decades; many recipes historically fold powdered sugar into dark chocolate or molasses dough to create a crackled surface. The approach of starting with a cake mix is a modern convenience adaptation that preserves the soft texture while simplifying the process. Brightly colored versions have become a beloved part of seasonal celebrations where visual flair is as important as flavor.
Seasonal Adaptations
For winter holidays, use classic red and green. For other occasions, swap colors: pastels for Easter, orange and black for Halloween, or team colors for sports parties. Add 1/2 teaspoon of peppermint extract to the dough for a minty winter twist, or fold in 1/4 cup mini chocolate chips for extra texture (reduce powdered sugar coating slightly to maintain crinkle definition).
Meal Prep Tips
Prepare dough ahead by mixing, dividing, coloring, and shaping into balls, then freeze the uncoated balls on a tray. Once firm, store in freezer bags and bake directly from frozen, adding 1 to 2 minutes to the bake time. For school lunches or grab-and-go snacks, portion into small containers with a napkin to keep them from becoming sticky. This method saves time on busy holiday mornings and ensures you always have fresh-baked personality on hand.
These red and green crinkle cookies are a simple, cheerful way to fill a cookie tin, decorate a dessert table, or make memories with helpers in the kitchen. Give the method a try, tweak the colors, and make the results your own — the technique is forgiving and the payoff is joyful every time.
Pro Tips
Use gel food coloring for vivid hues without thinning the dough.
Chill dough for 30 minutes to reduce spreading and enhance crinkle formation.
Roll the dough balls generously in powdered sugar to create deep, snowy cracks during baking.
Flash-freeze unbaked dough balls on a tray before storing to prevent them from sticking together.
Bake cookies until edges are set but centers still look soft to preserve tender texture.
This nourishing festive red and green crinkle cookies recipe is sure to be a staple in your kitchen. Enjoy every moist, high protein slice — it is perfect for breakfast or as a wholesome snack any time.
FAQs about Recipes
How do I keep the red and green colors from fading?
Yes. To keep the colors vibrant, use gel food coloring and avoid overbaking. Baking a minute less helps preserve color intensity.
Can I freeze these cookies?
Yes. Freeze baked cookies on a tray until firm, then transfer to an airtight container or freezer bag for up to 3 months.
What if my dough is too sticky or too dry?
If dough is too soft, chill longer. If too dry, add up to 1 teaspoon of water or oil. Always look for a tacky but not overly sticky dough.
Tags
Festive Red and Green Crinkle Cookies
This Festive Red and Green Crinkle Cookies recipe makes perfectly juicy, tender, and flavorful steak every time! Serve with potatoes and a side salad for an unforgettable dinner in under 30 minutes.
Ingredients
Main
Instructions
Combine dry mix and wet ingredients
In a large bowl, whisk together the entire box of white cake mix, 2 large eggs, and 1/3 cup vegetable oil until a smooth, thick dough forms and pulls away from the bowl sides.
Divide and color dough
Split the dough into two equal portions. Place each in a separate bowl and add gel food coloring a few drops at a time until color is vibrant and evenly distributed.
Chill the dough
Cover both bowls with plastic wrap and refrigerate for 30 minutes to firm the dough which reduces spreading in the oven.
Preheat and prep baking sheet
Preheat oven to 375°F (190°C). Line baking sheets with parchment paper or silicone mats to ensure even browning and easy removal.
Portion and coat
Scoop tablespoon-sized portions and roll into balls. Roll each ball generously in 1/3 cup powdered sugar until fully coated.
Bake
Arrange dough balls 2 inches apart and bake for 9 to 11 minutes until cookies are crinkled and set at the edges but centers remain soft.
Cool
Let cookies rest 2 to 3 minutes on the baking sheet, then transfer to a wire rack to cool completely before serving or storing.
Last Step: Please leave a rating and comment letting us know how you liked this recipe! This helps our business to thrive and continue providing free, high-quality recipes for you.
Nutrition
Did You Make This?
Leave a comment & rating below or tag
@mrsrecipe on social media!
Categories:
You might also like...

5-Minute Thanksgiving Appetizers That Wow Every Guest
Tiny crostini topped with creamy cheese, bright cranberry, crunchy pecans and rosemary — an effortless 5-minute starter that looks festive and tastes like the holidays.

African-Style Pancakes (Fluffy, Comforting, and Easy)
Light, slightly spiced pancakes inspired by African home kitchens—fluffy, buttery, and perfect for breakfast or brunch with syrup, cinnamon sugar, or a savory filling.
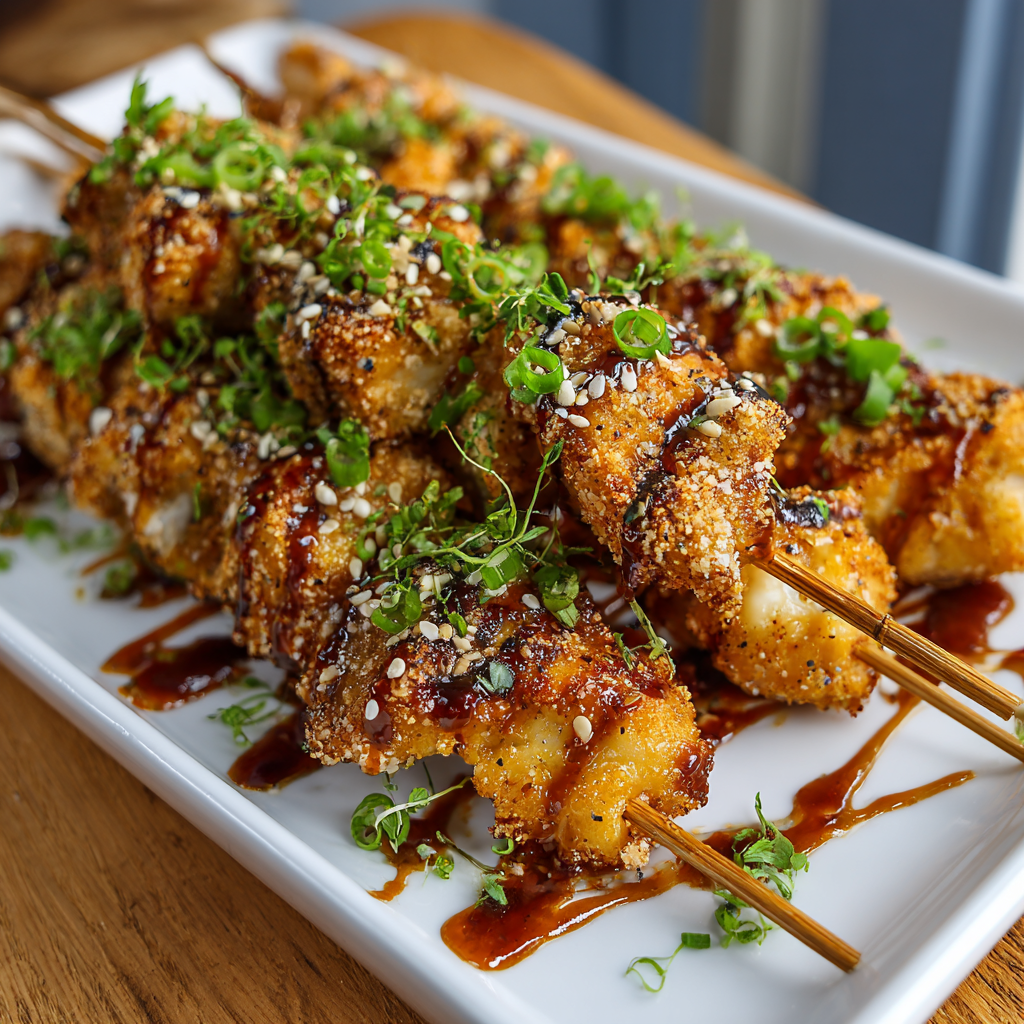
Air Fryer Bang Bang Chicken Skewers
Crispy, saucy chicken skewers made in the air fryer with a sweet-spicy bang bang sauce—perfect for weeknight dinners, parties, or meal prep.
Did You Make This?
Leave a comment & rating below or tag @mrsrecipe on social media!
Rate This Recipe
Share This Recipe
Enjoyed this recipe? Share it with friends and family, and don't forget to leave a review!
Comments (1)
This recipe looks amazing! Can't wait to try it.
Comments are stored locally in your browser. Server comments are displayed alongside your local comments.
Hi, I'm Clara!
What's Popular
Get My 30-Minute Meals email series!
Quick and easy dinner ideas delivered to your inbox.